Wireless Speaker Arduino – During Fall 2014, third-year SEECS Electrical Engineering (BEE-4) students took their second electronics course, Electronic Circuit Design (ECD), advancing the basic devices and circuits learned in the first electronics course toward circuit design. happened More complex and practical circuit analysis.
Due to the nature of the course, students were assigned a semester project to learn something new and create something different. Dr. Hamad M. Cheema, instructor of the course, set some interesting requirements. Each group of students had to design and build a functional device using a Bluetooth Low Energy (BLE, aka Bluetooth 4.0) chip and an Android app. RFduinos is a very useful microcontroller board for this purpose with the RFduino BLE chip, compatible with Arduino-like coding.
Wireless Speaker Arduino

The results were great. Students came up with some useful and innovative projects that solve various problems faced by consumers in their daily life. In a series of blog posts, the IEEE-SEECS Publications team will cover several projects, their motivation, basic design, and problems students faced in their designs. Here is the first in the series, a wireless speaker.
Arduino Projects With Code, Diagrams [beginner & Advacned] 2021
Have you ever been to a friend’s house and wanted to play your phone’s playlist on their awesome sound system? But you need to copy songs from your phone memory or use the auxiliary port and connect your phone to the system. Both are kind of a hassle and not very comfortable. The creators of this project faced such a situation and felt that the solution they came up with would meet the needs of this project.

What if you had a small device that you could connect to any speaker, connect your phone to it via Bluetooth and play songs from your phone, completely wirelessly?
The overall design of the BLE controlled speakers included an Android music app that communicated with the Bluetooth device. The music app had to convert the audio file being played into signals that could be transmitted via Bluetooth. The device then had to process the signal and produce an output on a simple audio jack.

Lab: Tone Output Using An Arduino
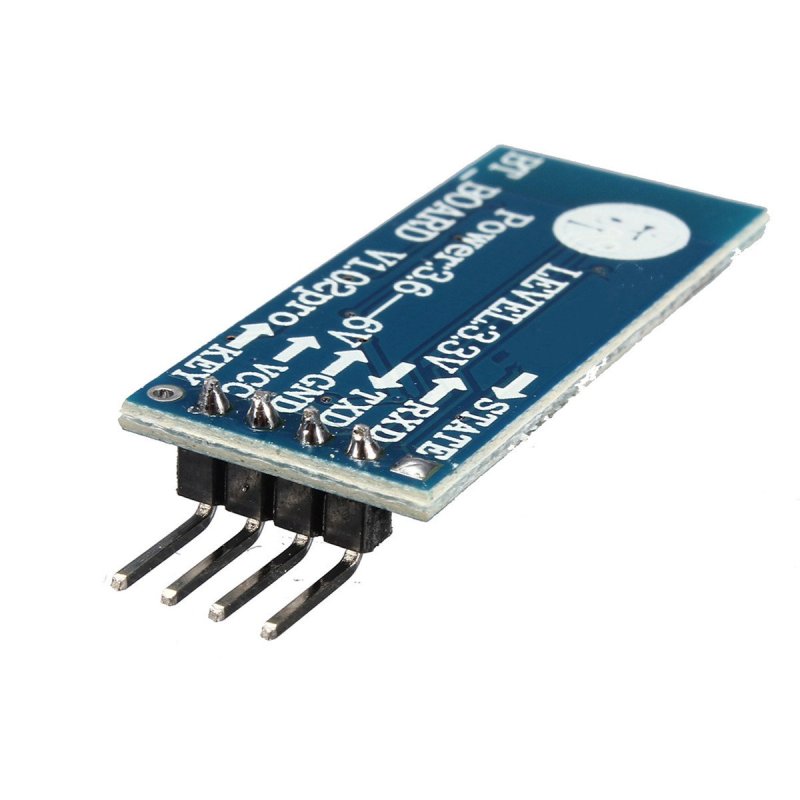
Unlike other projects, this one didn’t use an RFduino board. Instead he used a separate Bluetooth module breakout board (BC217) coupled to an Arduino Nano. BC217 performed Bluetooth communication and signal processing. The rest was handled by the Arduino Nano. The choice of Nano over other Arduino boards is designed to save power.
One of the main problems the project members encountered early on was that the RFduino board recommended by the guide was not designed for audio and had not been used for this purpose before. Making it work would be, in the words of one student, “a project in itself.” So they were allowed to use a Bluetooth chip that had some signal processing functionality so they didn’t have to start from scratch. They decided to use the “BC127”, a Bluetooth 4.0 module with several audio codecs built into it.
![]()
The last device demonstrated had a range of 25-30 meters outdoors and about 2 normal-sized bedrooms indoors. Music output on the speaker side was clear. An additional feature that was added was that speech spoken into the phone’s microphone could also be played through the speaker, just like music. The students working on the project said the first improvement they could make was to reduce the size of the hardware. With the proper tools, the BC217 module itself can be used instead of the entire breakout board. (In the picture below, the module itself is the small shiny part on the red PCB, which is the entire breakout board).
Amazon.com: Diy Bluetooth Speaker Box Kit Electronic Sound Amplifier
Eliminating the use of breakout boards and using SMDs for other devices will greatly reduce the overall size of the final product. IEEE-SEECS wishes them success in this. This tutorial shows how to use the board (Xero, MKR Zero or MKR 1000 Wi-Fi) to play a wave file stored on an SD card using the Audio Zero library and a 10-bit DAC. go

To connect the speaker to the board, you need to add an amplification circuit connected between the pin and the speaker. An amplification circuit will increase the volume of the speaker. There are many audio amplifiers available, one of the most common being the LM386. The following schematic shows how to build a circuit using an LM386 and a bunch of components.
You can supply the LM386 connecting the Vs pin to a different voltage source, such as +5 V on the 5V pin of the Zero/MKRZero or an external 9V battery. The gain of the amplifier is provided by a capacitor connected to pins 1 and 8 of the LM386. With the 10 µF capacitor the gain is set to 200, without the capacitor the gain is 50. With the potentiometer you can control the volume of the amplifier.

Amazon.com: Alamscn Mini Mp3 Player Module Dfplayer Audio Music Modules Voice Decode Board Tf Card U Disk Io/serial Port/ad Board With 2w 8ohm Speaker Round For Arduino Diy (3pcs Mp3 Player +
For Xero and MKR1000 you need to connect the shield or module for SD or microSD card to CS on pin 4.
For the MKRZero, the microSD slot is built-in. A .wav file named “test.wav” is in the root directory of the card. For a simple test, you can connect a pair of headphones directly to ground and DAC0, respecting the polarity.

1. First, let’s make sure we have the drivers installed. If we use the web editor we don’t need to install anything. If we use offline editor, we have to install it manually. This can be done by going to Tools > Board > Board Manager…. Here we need to find SAMD (32-bit ARM Cortex M0+) boards and install them.
Arduino Based Text To Speech Convertor
2. Now, we need to install the required libraries. If we use the web editor, there is no need to install anything. The AudioZero library can be installed from the IDE’s library manager. To do this, open the IDE, go to Tools->Manage Libraries. There you can find AudioZero and install the library shown. The More Information link will take you to a GitHub page that contains all the documentation for the library. See this guide for a more detailed explanation of installing and importing libraries.

The audio file saved on the SD card must be in .wav format at 88200 Hz, 8-bit unsigned PCM quality. This type of file can easily be created by software such as Audacity.
After uploading the code, your audio file should start playing, the audio file is defined in the code as follows. To get more information about playback, open Serial Monitor in the IDE by going to Tools > Serial Monitor. Note that the volume of an amplifier can be controlled by a potentiometer.

Mhz 1 Transmitter Module & 4 Wireless Relay Controller For Arduino Uno Mega2560|controller Skin|control Buoycontrol Amplifier
In this example, we learned how to create a simple audio player using the Audio Zero library! If you want to expand on this project, check out the Weather Audio Notifier tutorial to create a project that will alert you to changes in the weather.
Contribute Join the community and suggest improvements to this article via GitHub. Be sure to read the donation policy before submitting your return request.

Recommend content changes to documents. Built using the public GitHub repository. You can read more about how to donate in the Donation Policy. The RN-52 Audio Bluetooth Breakout is a sleek Bluetooth audio module from Roving Networks broken down on an easy-to-use PCB. It allows you to send stereo audio over a wireless Bluetooth connection. The module has an embedded DSP that handles the audio stream coming in and out of the module, converting digital wireless signals to audio and vice versa. The module is easy to configure with ASCII and GPIO commands. It can function as a standalone module, or it can be integrated with a microprocessor to create the ultimate wireless audio experience.
Simple Audio Player
In this guide, we will look at some of the features of the module. We’ll show you how to configure the module to suit your projects needs, how to wire it up, and walk through a simple example project using the RN-52.

As with any product, it is wise to read the data sheet before embedding this device into a project.
RN-52 is a Bluetooth v3.0 module. It is compatible with all Bluetooth v3.0 devices and also backwards compatible with all Bluetooth v2.1 + EDR, 1.2 and 1.1 devices.

Uart Serial Mp3 Music Player Module With 1w Speaker Onboard Monaural Amplifier /speaker Socket To Play Mp3 Wav Audio For Arduino
*Note: Multiple profiles can be applied simultaneously. Default settings are set so that all profiles are discoverable.
The RN-52 is a Class 2 Bluetooth device, which means the range of the on-board antenna is approximately 10 meters. Thus, you should be able to stream audio to the module from about 32 feet away in the open air. This limit will be reduced if you pass through walls or windows.

The RN-52 differs from other Bluetooth modules in that it can stream audio. It does this using a digital signal processing (DSP) chip. When streaming audio
Stereo Audio With Arduino
The RN-52 converts radio waves sent from a DSP transmitting device (phone, computer, etc.) into

Arduino speaker module, arduino and speaker, speaker module for arduino, arduino speaker amplifier, arduino speaker, piezoelectric speaker arduino, arduino speaker music, ultrasonic speaker arduino, speaker for arduino, mini speaker arduino, 8 ohm speaker arduino, arduino wireless speaker